Neural Style Transfer
Neural Style Transfer is the process in which content of an image and style of another image are combined together to create a new image. Prisma uses style transfer to transform your photos into works of art using style of famous artists.
In this blog post, we will learn how to implement it and reproduce these amazing results. We will use Keras with Tensorflow backend to achieve this.
Import the necessary libraries
import matplotlib.pyplot as plt
%matplotlib inline
import importlib
import numpy as np
from scipy.optimize import fmin_l_bfgs_b
from scipy.misc import imsave
from keras import metrics
from keras.model import Model
from keras.applications import VGG16
from PIL import Image
import keras.backend as K
Recreate Content
Before we do style transfer, we need to recreate the content image from a random image.
img = Image.open('hugo.jpg')
img.size
We will use the VGG16 model(pre-trained on Imagenet) to get the activations necessary to calculate the target activations. In the VGG16 model, the authors subtracted the mean of each channel(R, G, B) from the image and the channel format used was BGR instead of RGB. The mean of each channel has been provided by the authors of the VGG16 model.
Hence, we need to do the necessary preprocessing of the image before we use the model.
mean_sub = np.array([123.68, 116.779, 103.939], dtype=np.float32)
pre_processing = lambda x: (x - mean_sub)[:,:,:,::-1]
To plot the image again, we need to deprocess it.
de_preprocess = lambda x, shape: np.clip(x.reshape(shape)[:,:,:,::-1] + mean_sub, 0, 255)
Let’s convert the image into (batch_size, height, width, channels) so we can feed it to the CNN.
img_arr = pre_processing(np.expand_dims(np.array(img), 0))
shape_content = img_arr.shape
Let’s define the VGG16 model
model = VGG16(weights='imagenet', include_top=False)
Now, we will grab the activation from block2_conv2 by following Johnson et al.
layer = model.get_layer('block2_conv2').output

# Create a model based on the layer
layer_model = Model(model.input, layer)
After creating the model, we need to predict the target activations.
target = K.variable(layer_model.predict(img_arr))
We will define an Evaluator class to access the loss function and gradients of a function because that is what scikit-learn’s optimizers require.
class Evaluator(object):
    def __init__(self, f, shp): self.f, self.shp = f, shp

    def loss(self, x):
        loss_, self.grad_values = self.f([x.reshape(self.shp)])
        return loss_.astype(np.float64)

    def grads(self, x): return self.grad_values.flatten().astype(np.float64)
Let’s calculate the mean squared error of the layer activation and the target activation. This will be our loss function which the optimizer will optimize so that our random image looks more like the content image.
loss = metrics.mse(layer, target)
grads = K.gradients(loss, model.input)
fn = K.function([model.input], [loss] + grads)
evaluator = Evaluator(fn, shape_content)
L-BFGS is the optimizer that we will use, since it optimizes much faster than gradient descent. You can read about it here. We will save the image after each iteration, so we can see how the random image optimizes to the original image.
def solve_image(eval_obj, niter, x, path):
    for i in range(niter):
        x, min_val, info = fmin_l_bfgs_b(eval_obj.loss, x.flatten(),
                                         fprime=eval_obj.grads, maxfun=20)
        x = np.clip(x, -127, 127)
        print ('Minimum Loss Value:', min_val)
        imsave('{}res_at_iteration_{}.png'.format(path, i), de_preprocess(x.copy(), shape_content)[0])
    return x
Its time to train the random image.
def rand_img(shape):
    return np.random.uniform(-2.5, 2.5, shape) / 100

x = rand_img(shape_content)

x = solve_image(evaluator, 10, x, resultspath)
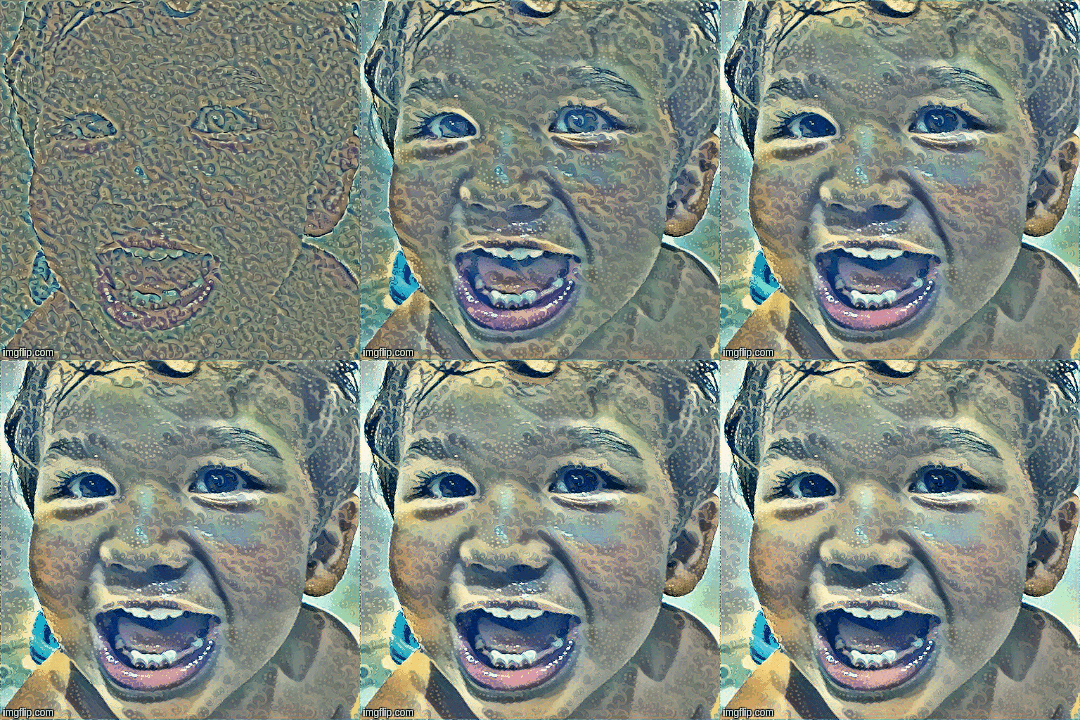
This is how the image changes per iteration to approach the content image.

Recreate Style
Let’s initialize the style image and do the necessary preprocessing.
style = Image.open('starry_night.jpg')
if style.size != img.size:
    style = style.resize(img.size, Image.ANTIALIAS)

style_arr = pre_processing(np.expand_dims(np.array(style), 0))
style_shape = style_arr.shape
We will follow all the steps exactly as we did in the content step but with a slight change. We will use the activation of 5 layers to recreate the style. We will grab the activations from block1_conv2, block2_conv2, block3_conv3, block4_conv3, block5_conv3 by following Johnson et al.
After initializing the model, we will get the activations of all the layers.
model = VGG16(weights='imagenet', include_top=False, input_shape=style_shape[1:])
outputs = {layer.name:layer.output for layer in model.layers}
temp = ['block1_conv2', 'block2_conv2', 'block3_conv3', 'block4_conv3', 'block5_conv3']
style_layers = [outputs[i] for i in temp]

# Calculating the target activations
style_model = Model(model.input, style_layers)
style_target = [K.variable(i) for i in style_model.predict(style_arr)]
Instead of using mse like we did in recreating the content, we will use gram matrix(product of the matrix and its transpose) of their channels before we apply mse. Gram matrix shows how the convolutional layers correlate and completely removes all the location information. Hence, matching the gram matrix of the channels can only match some of the texture information and not the location information.
def gram_matrix(x):
    features = K.batch_flatten(K.permute_dimensions(x, (2, 0, 1)))
    return K.dot(features, K.transpose(features)) / x.get_shape().num_elements()

def style_loss(x, targ):
    return metrics.mse(gram_matrix(x), gram_matrix(targ))

# Calculating the loss function for all the style layers
loss = sum(style_loss(l[0], t[0]) for l, t in zip(style_layers, style_target))
grads = K.gradients(loss, model.input)
fn = K.function([model.input], [loss] + grads)
evaluator = Evaluator(fn, style_shape)
Let’s fit the random image to recreate our style.
import scipy

# Here, we don't divide the random image function by 100,
# to provide sufficient variance so as the gradient doesn't become constant.
def rand_img(shape):
    return np.random.uniform(-2.5, 2.5, shape)

x = rand_img(style_shape)
solve_image(evaluator, 10, x, resultspath)
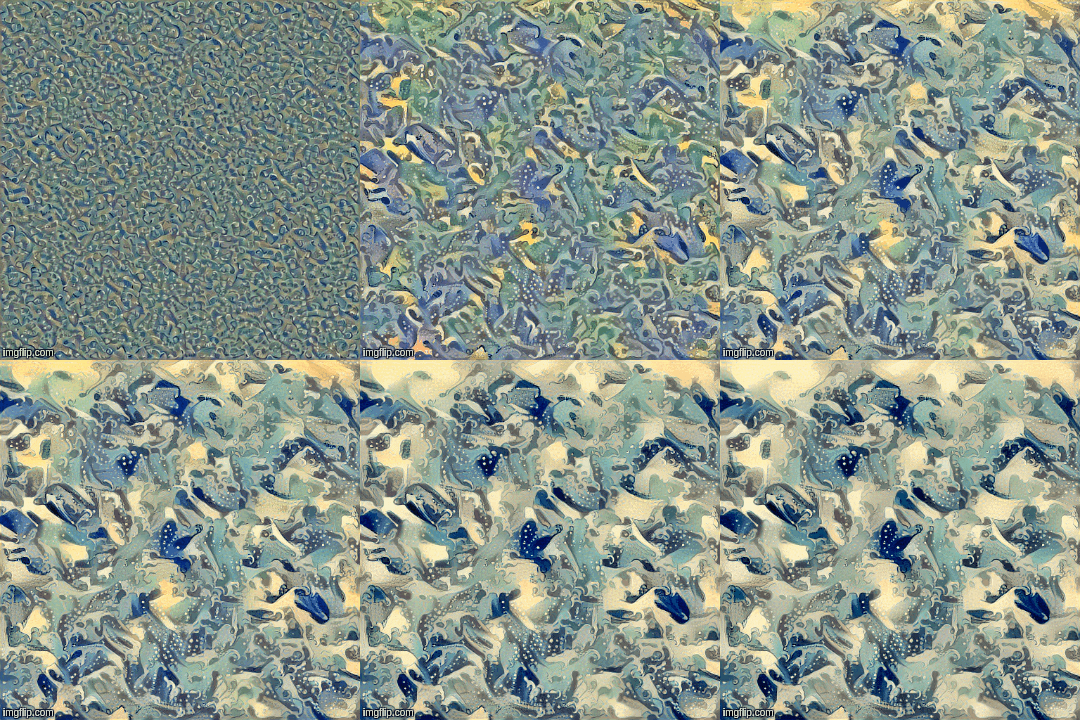
This is how the style is recreated after each iteration.

Style Transfer
Now to the most exciting part, let’s merge both the processes and create the prisma like photo. For this, we just need to merge the content loss and the style loss. We will also assign weights so as to decide how much content and loss we want in the combined image. You can play around with how much content or style you want. You might get more aesthetically pleasing images.
content_layer = outputs['block2_conv2']
# The model used here is the VGG16 model
# initialized in the style recreation part
content_model = Model(model.input, content_layer)
content_target = content_model.predict(img_arr)

style_weights = [0.05,0.2,0.2,0.25,0.3]
total_loss = sum(style_loss(l[0], t[0])*w for l, t, w in zip(style_layers, style_target, style_weights))
total_loss += metrics.mse(content_layer, content_target)/10

grads = K.gradients(total_loss, model.input)
fn = K.function([model.input], [total_loss] + grads)
evaluator = Evaluator(fn, style_shape)
Fitting the random image to get our final image.
x = rand_img(style_shape)
solve_image(evaluator, 10, x, resultspath)
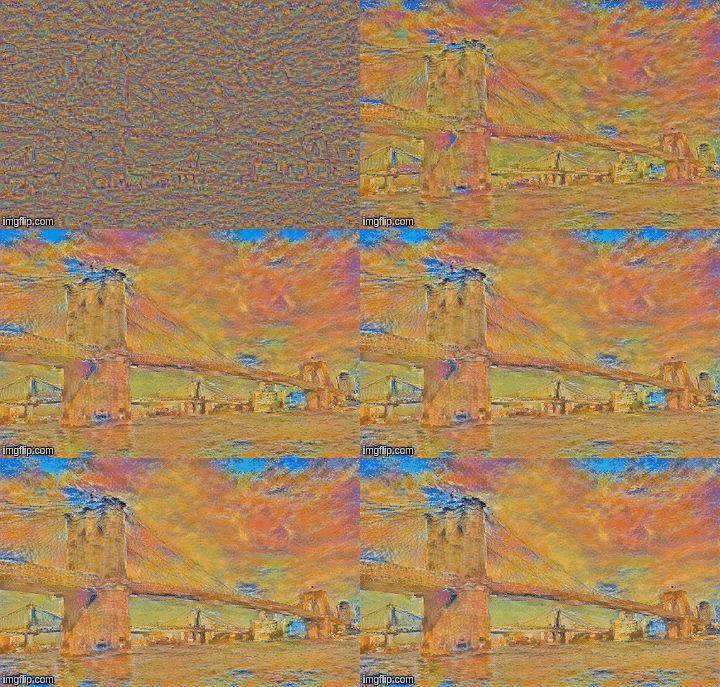
This is the result of the style transfer. The results are pretty good.

I highly encourage you to experiment with the changing the layers used to recreate the content and the style and the amount of content and style you want. For example, I used block4_conv2 and included 1/5th of the original content. I also changed the style weights to [0.05,0.15,0.2,0.3,0.3]. The result I got after doing this is much more awesome according to me.

The code for the style transfer lives here.
If you’re interested in collaborating, discussing or working with me on an exciting idea, contact me at yash DOT katariya10 AT gmail.com
Until next time,
Ciao